Saturday 27 April 2019

Buds and Petals


This could not be more different to my last art project. I love all kinds of art and don't like to stick to one genre as I get bored easily.

I can't even remember the last time I used watercolour. Some time ago I bought some Daniel Smith watercolours and have hardly used them. So I dusted them off and hand painted this kind of whimsical impression of some buds and petals for this week's one layer challenge over at Less Is More.

 P1060596a

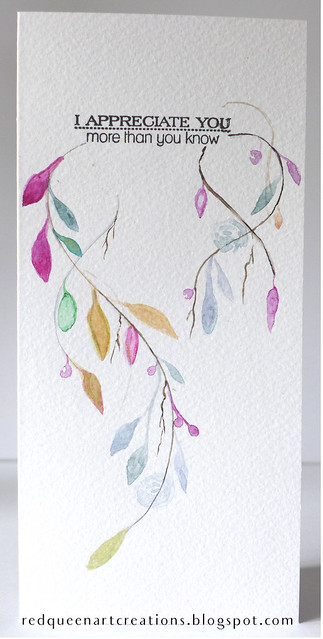
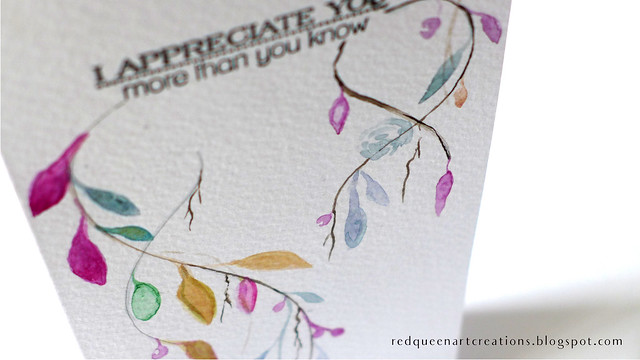
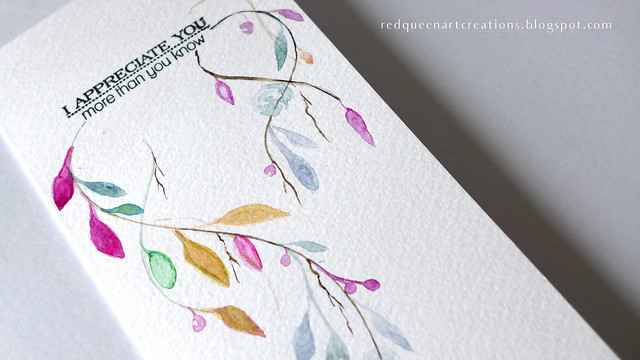
I liked the idea of these delicate vines hanging from the sentiment (by Papertrey). Then it was just a case of adding the petals and buds in a variety of colours.

P1060602a 

I used some very fine watercolour brushes from Ebay for the vines and chinese watercolour brushes for the petals.

 P1060612

The watercolour paper is just some I had in my stash and I don't know where I got it from.

P1060599


I am rusty at watercolour painting but I quite like how it turned out. I think with a bit more practice I could improve on this.

P1060600

Anyway, I hope you like it, thank you so much for stopping by, Eleanor xx

Friday 26 April 2019

Abstract mark making session...


One of my favourite things to do is mark making, especially when I get in a bit of a rut which I think I have done recently. This was purely a mark making exercise and not intended to be "finished" pieces of art, just mark making for the pure fun of it!

P1060463 

I started by dividing my paper with masking tape. I have used an A3 heavy weight mixed media cardstock. By dividing the paper this way you get a co-ordinating series of art work without much effort.
I started the process by scribbling with my Boldmere B pencils, the darkest of which is 8B. I also used my beloved Paintstik oil sticks by Markal. These are great if you just scribble, or whether you scribble then blend. They also work well with acrylic paints layered over the top.

I also used my wax crayons by Manley which I got from Amazon. I love the wide range of colours in the pack of 30.

P1060510


To apply the acrylic paint I used a small rubber brayer and the side of my hand which you can see in the video. It was why I wore rubber gloves for this project! I use my fingers a lot for acrylic painting, but the side of my hand gave a completely random brushed effect without any brush marks.

I like to use these mini art pieces as a springboard for larger projects or just keep them as they are to refer back to if I need to.

P1060476


I think these would look great translated on to a large canvas.

P1060483 

I have a Youtube video for anyone who would like to see the process. I hope it inspires you!


Thank you for stopping by, Eleanor x

Wednesday 24 April 2019

Finnabair April 2019 challenge "burgundy"

I've been struggling the last couple of weeks to even get in my craft room. Frustratingly I have to pace myself as I get tired so easily but at least I managed to put together these art journal pages for this month's colour challenge over at Finnabair which you can see here.

I rarely use the colour burgundy and definitely found this a challenge. I have tried to achieve different tones and values with the red and burgundy paints that I have. 

I don't think I've ever created such a vivid piece of work!

P1060345

My "art journal" is in fact an old book fom a charity shop. I like it because it is quite small and not too daunting. 

For texture, I've used Finnabair's "swirly florals" stencil.

P1060344

To pick up on the touches of gold I tried to add some gold foiling whilst the paint was still wet but it didn't work too well. Instead I brushed a Tim Holtz ornate book plate with gold gilding wax. The sentiment is a Finnabair sentiment sticker.

 It has been good to use colours outside of my comfort zone. I nearly gave up at one point as the red colours seemed too over powering, but although this is much more vivid than my usual work I actually quite like it!

I managed to produce a video for anyone who wishes to see the process.


I hope you enjoy the video and thank you for stopping by, Eleanor x

Friday 12 April 2019

Bright and colourful cards with neon acrylic inks

I am so in love with bright colours at the moment but I decided to take it to the limit by adding neon colours. I never realised just how happy neon colours make me.

P1050562 

I began by stencilling acrylic inks to create a background pattern. Not necessarily an obvious thing to do as you don't get a nice crisp stencil outline with acrylic inks. But it wasn't the look I was after. I just wanted to create a little watery random pattern to add some "visual" texture.

 P1050556

In addition to using acrylic inks I used Dr P H Martin Bombay india inks. I really love adding these over the top of my art work as they are transparent and waterprooof. As they are transparent you can still see some of the earlier stencilled pattern underneath.

P1050565

The combination of the acrylic inks and india inks almost create a watercolour effect, although I think the colours are much brighter and deeper than watercolour.

I have used sari silk ribbon from Ebay to finish my cards.

P1050566

I usually used really inexpensive white card from The Range for mixed media which may not make sense as it is not a heavyweight cardstock. I used to worry and fret so much about card warping when adding ink and paint which I found occured no matter how heavy the cardstock was.

My way around this is to adhere my art work to another piece of card to reinforce it when I have finished. That way I don't have to use expensive heavy weight card in the first place only to end up reinforcing it anyway. I came to the conclusion years ago that I may as well use cheaper card instead.

P1050576

One of my other recent discoveries was grid paper which I got from Ebay. To me it is visually pleasing when you can see the grid pattern underneath the ink...

P1050555 

The Youtube video for this is slightly longer than usual. I think I got a bit carried away, this project became quite a labour of love! Please click on the picture below to see the full process.


I really hope you enjoy the video.

Thank you for stopping by, see you again soon, Eleanor x

Tuesday 2 April 2019

Don't be foiled...

I wanted to break away from the cool colours I have been working with recently and go really bright colours for a change. And this is what I came up with...

P1060239 

Using a variety of colourful acrylic paints I created my background...

P1060260 

I have foiled my sentiments by die cutting them from double sided adhesive sheets and rubbing them with gold foil from Crafter's Companion. The love die is by Hero Arts and the Hugs die is by Papertrey.

P1060228 

To create come contrast with the background I added a floral stencil with white paint and a black damask stencil design in black.

 P1060255
    
These really are such a contrast to my recent creations and I love the results.

P1060238 

There is no Youtube video for this one, sometimes I just like to play without the faffing of the video camera! Don't forget to check out my Youtube channel though as there are lots of art and mixed media videos on there you might like!
  
P1060251

These creations are for the Simon Says Challenge this week which is called "Don't be fooled, be foiled". 

I hope you are having a good day and thank you for stopping by!

Eleanor x