Sometimes when a painting really does not go the way you want it to, it is easier just to cover the whole thing with gesso and start again.
So that's what I did with this painting, with the layers underneath providing some fantastic texture.
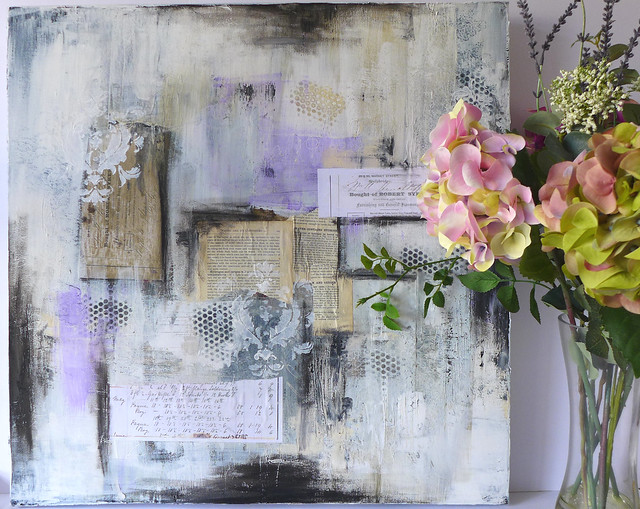
I continued to add more collage and stencilling. And by adding some grungy black marks with a Sennelier oil stick, it really began to take on a distressed shabby chic look.
In the next photo you can really see the amazing texture.
I thought the damask stencil really lent
itself to the whole new vintage vibe. Unfortunately it is quite an old
stencil and I'm not sure who made it but there are plenty of similar on Amazon and Ebay.
I will continue to work on this but I have several projects on the go at the moment, I keep getting so eager that I move on to my next idea without finishing my last project!
Anyway, I hope you like the video with the painting as it is at the moment,
Sometimes I just want quick results, especially if my mojo is flagging.
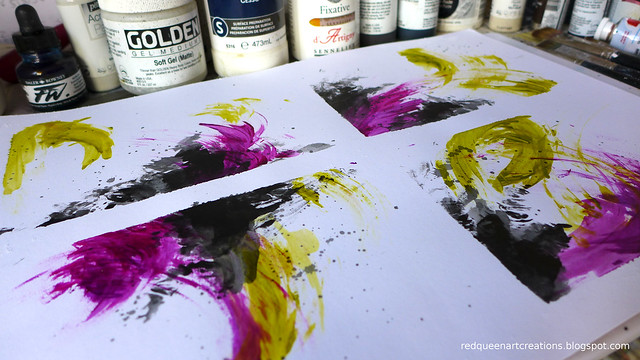
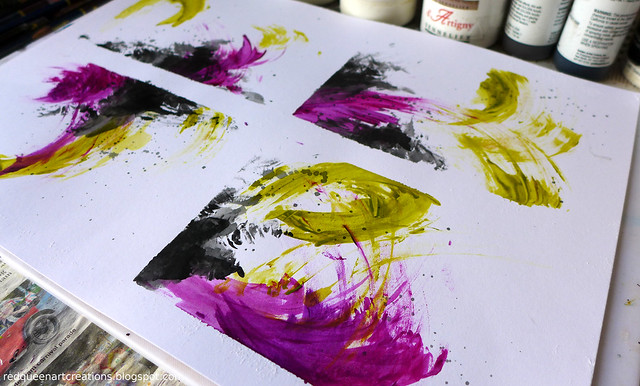
So what better way than this really quick and easy abstract using nothing but the side of my hand to apply the paint.
I first divided my A3 card (300gsm mixed media card) into 4 sections with masking tape and used Decoart fluid acrylic paints in Quinacridone Magenta and Green Gold, and of course black. I have tried using this technique with other acrylic paints but the fluid acrylics work really well for getting this sweeping motion with the side of my hand.
I can think of so many uses for this kind of art work, I can use it as a basis to create a more detailed piece of art, cut it up to make a series of art work just as it is, or as a great way to experiment with different colour combinations. But for me today it was simply a way to express myself when my creativity was a bit low.
And here is the video...
I hope it provides inspiration for you too! Thank you for stopping by, Eleanor x
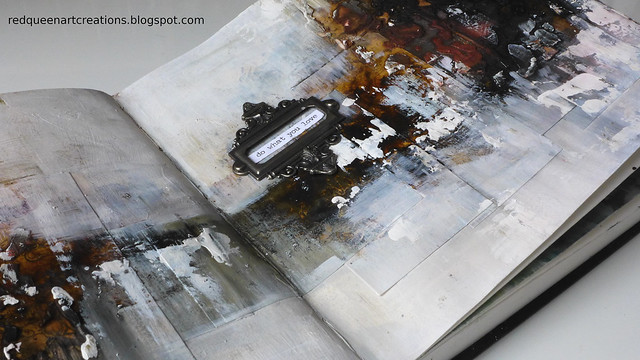
Having been focusing on large canvases lately I fancied a change so I have returned to art journaling.
These pages are actually a rework of pages that I considered to go horribly wrong the first time round, which is why my Youtube video starts with the pages partially completed. Initially I cover it all up with white gesso and start again.
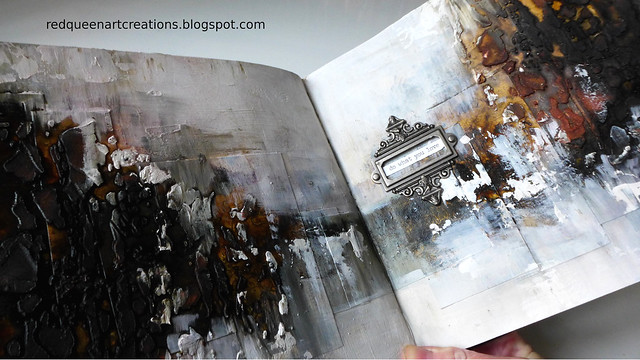
To help cover my previous work and add texture, I used France Papillon stencil "rockformation". I had no idea at this point just how much I was going to fall in love with this stencil.
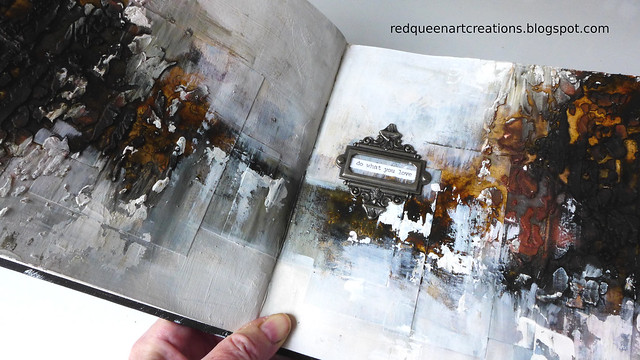
However, after applying the gesso and starting to add Lindy's spray inks it still did not feel that I was getting anywhere with these pages. It just looked very messy until I let the inks dry and began to add white paint to calm it all down.
Suddenly the richness of the Lindy's spray inks really became apparent. The main two colours I used were Lindy's Cocklebells Coral and Red Hot Poker Orange.
However, it was the addition of Golden's Sepia high flow acrylic that sealed the deal for me. I can't tell you how much I love this colour paint except to say I ordered a really large bottle after discovering it!
Now the difficulty with the Lindy's spray inks is that they are water soluble and so reactivate when wet. So when I added white acrylic paint there was initially some mixing of colours but this actually added to the depth of colours.
But the bit that really brought these pages alive for me was lightly brushing white acrylic paint over the texture of the stencil and then using a palette knife to really bring out the beautiful detail of this stencil.
I have to say these reworked pages turned out better than I could ever have imagined, but it was the "failed" layers underneath that really formed the basis of, I think, the successful outcome. So the moral of the story is if you don't like your original art work, gesso over it and start again, you never know what you may get!
Despite my happiness with the art journal pages themselves, I can't say the same for my video. I used a glass mat to protect my worktop form all the spray ink but it caused a lot of glare in the video. Having said that you can still clearly see the process and for anyone who watches it I hope this does not spoil the experience for you.
I will be entering my art journal pages into this week's Simon Says Monday Challenge which is "use stencils".
I hope you enjoy the video and I will be back soon! Eleanor x
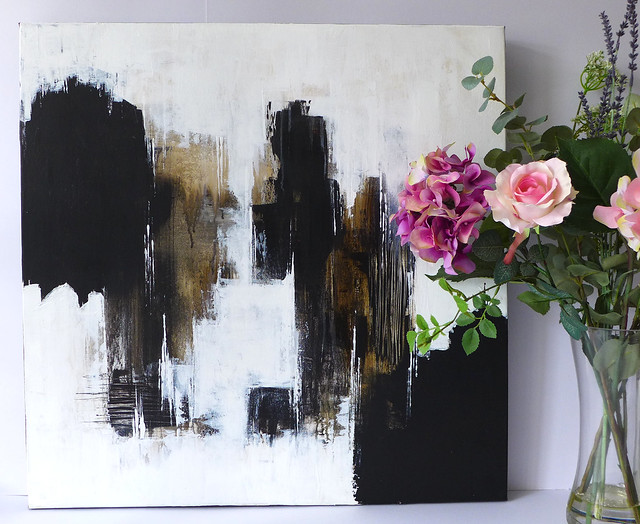
This is the largest canvas I've ever attempted- a 24" x 24" box canvas and I'll admit it did seem quite daunting at first.
I decided on a neutral colour scheme but other than that I had no other plan for this canvas before I started.
I began by adding some gesso for a little added texture with a large spatula. I then added some Golden fluid acrylics in sepia, burnt umber and black. I love the almost watercolour effect of these acrylic paints.
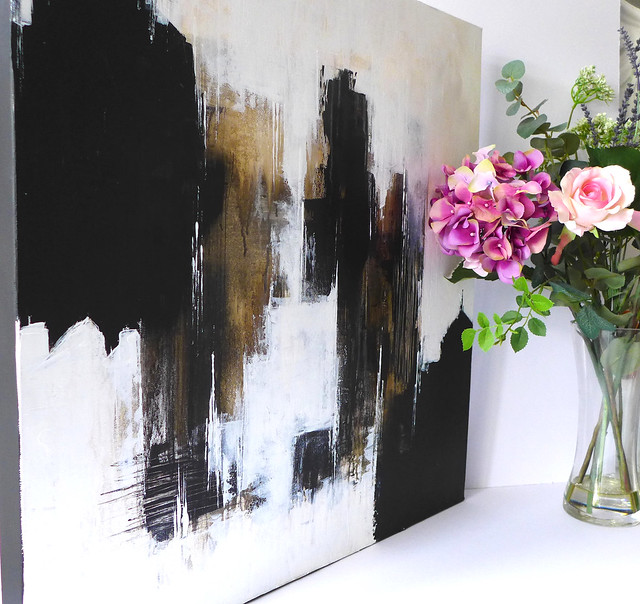
I realised as I was working that I was focusing on the middle of the canvas too much and eventually tied it all together by adding areas of black on each side.
Towards the end I could see the beginnings of a citiscape but decided not to follow that path for this painting. Having said that I will at a later stage continue to work on this painting and see what transpires, it just isn't quite finished how I want it to be.
I quite like the result so far but now wish I had started with a lot more texture, but it's a good excuse to try again! I really enjoyed working large, there's just so much more space to experiment.
For those that watch me on Youtube you will probably notice this is
my first video where I have placed the camera to one side of me rather
than overhead. The canvas was just too big to lay flat on my work table
under the camera but I really like the different perspective of this video. You can just make out my camera rig that my husband made for me, it is so versatile that the cross bar acts as an easel too!
Given that this painting did take quite a bit if time, I have speeded it up quite a lot. I hope you enjoy it!
It is ages since I worked on canvas. As you may be aware from Youtube or my blog I usually work on card so it made a change to work on this 16" square 3D box canvas.
I wanted to create something that I hope is easy to follow and recreate. Just some simple acrylic painting with some stencilling and rubber stamping too.
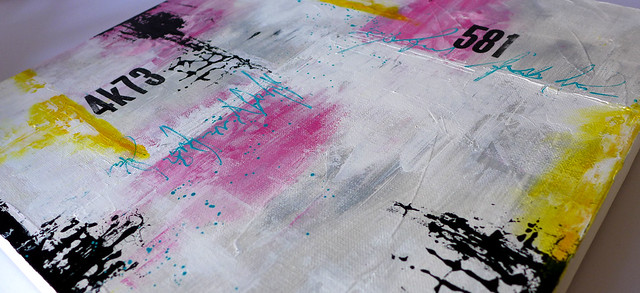
I chose one of my favourite colour combinations of pink, teal and yellow on a grey background.
For my background I used Americana paints in storm cloud grey, slate grey and graphite, mixed with white. I love the Americana paints, they are good quality but reasonably inexpensive. Before the paint was dry I used a silicon brush shaper by Finnabair to scribble into the wet paint.
The first stencil I used (on top of the pink areas of paint) is by AALL & Create called Broken Circles, one of my favourite stencils. Rather than add paint with the stencil, I removed paint instead with a baby wipe.
I didn't want a really obvious pattern so I blurred it a little as I continued to paint. The pink paints I used are Pebeo acrylic paint in Fuschia and Decoart acrylic paint in cherry blossom pink.
The alphabet and number foam stamps are by Tim Holtz (I attach the link here). If you don't have any number stamps you could always type out some numbers and letters and collage them, assuming of course you have a printer.
It was a bit ambitious stamping on to a box canvas, but all I did was just put a heavy book roughly the same depth as my canvas underneath my painting so that it made the surface rigid enough to stamp on.
I did the scribbly script in Golden's teal fluid acrylic paint using a fine tip applicator bottle and splashed some of the teal paint as well.
I love to grunge up my paintings so I used the edge of AALL & Create stencil called "parched earth" to dab black acrylic paint along each edge of the canvas. Again I was not looking for definite pattern from the stencil, just more of a random effect. You could probably achieve the same results with other stencils or some paint dabbed on to on a piece of acrylic.
I have used a variety of tools to apply the paint, not least my yellow window glass cleaning scrapers! I find hardware stores very useful for finding more unusual tools for painting.
To finish my painting I added some yellow paint by Hobbycraft, again really inexpensive, but I love this mustard shade of yellow.
I hope you enjoy the Youtube video. Even if I inspire one person in the world to try abstract art then I feel my job is done!
Thank you so much for stopping by, I have a lot more abstract art in the pipeline so please do check back! Eleanor x
One of my favourite things to do is mark making, especially when I get in a bit of a rut which I think I have done recently. This was purely a mark making exercise and not intended to be "finished" pieces of art, just mark making for the pure fun of it!
I started by dividing my paper with masking tape. I have used an A3 heavy weight mixed media cardstock. By dividing the paper this way you get a co-ordinating series of art work without much effort.
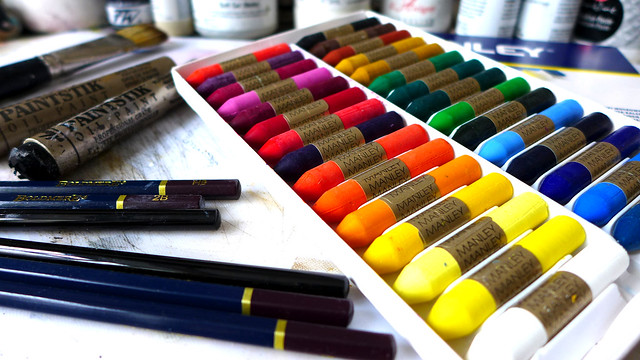
I started the process by scribbling with my Boldmere B pencils, the darkest of which is 8B. I also used my beloved Paintstik oil sticks by Markal. These are great if you just scribble, or whether you scribble then blend. They also work well with acrylic paints layered over the top.
I also used my wax crayons by Manley which I got from Amazon. I love the wide range of colours in the pack of 30.
To apply the acrylic
paint I used a small rubber brayer and the side of my hand which you
can see in the video. It was why I wore rubber gloves for this
project! I use my fingers a lot for acrylic painting, but the side of
my hand gave a completely random brushed effect without any brush
marks.
I like to use these
mini art pieces as a springboard for larger projects or just keep
them as they are to refer back to if I need to.
I think these would look great translated on to a large canvas.
I have a Youtube video for anyone who would like to see the process. I hope it inspires you!
I have made the decision to resurrect my blog. Now feels the right time. Let me explain...
After only a few months of starting this blog over a year ago, I was unable to continue with it. As my last post suggests my health was in trouble. Big trouble. Really big trouble. OK, not terminal, but nonetheless still very serious.
So I had to take a break. Despite feeling ill so much of the time, as soon as I felt well enough, I wanted to move into videoing my art work with a view to starting a Youtube channel. It kept me motivated through some very dark times.
Of course, it was the art that was the main motivation, not just the desire to do Youtube. Art has always been my saviour and has kept me going both physically and mentally.
So, my lovely hubbie made an overhead rig for my video camera, and when I felt well enough, I switched on the camera each time I worked. Then I had to learn video editing. Luckily hubbie is a whiz at the tech stuff and was able to teach me the ropes. But it took a long time as I could only learn it in between my health relapses. So my blog suffered, I simply could not do Youtube and blogging.
I had no idea how time consuming being a Youtube creator is, and I take my hat off to each and every one. There was so much to learn that only now do I feel confident with creating videos. I actually really enjoy video editing and find it every bit as creative as the art work. And in turn I now feel able to do Youtube and create blog posts as well. I enjoy writing as well a creating videos, and sometimes it easier to explain my thought processes in a blog rather than a video. Above all though, doing all of this has helped me get through some very tough times and has helped take my mind off feeling so tired and ill so much of the time.
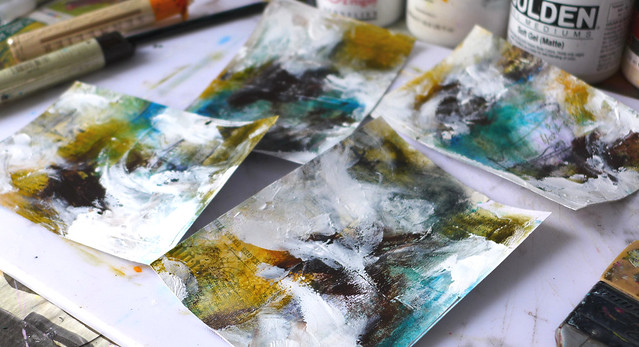
My new fave toys art products are Sennelier oil sticks as I demonstrated in my last Youtube video here. The Sennelier oil sticks blend very easily and can be used to create a very grungy, messy, smudgy background very quickly. Not only that but I discovered that you can layer acrylic paint over the top. It will dry and adhere perfectly.
And here is my messy desk with my messy art work...
I love love these colours. The rich yellow ochres combined with sepia and teal is especially one of my favourite colour combinations. In addition to the oil sticks I used Sepia Extra acrylic paint by Old Holland to add even more depth of colour.
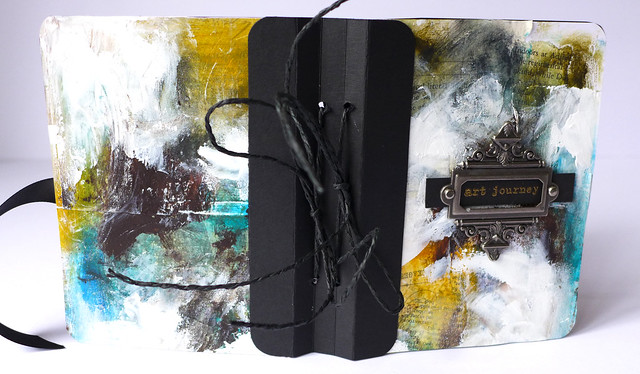
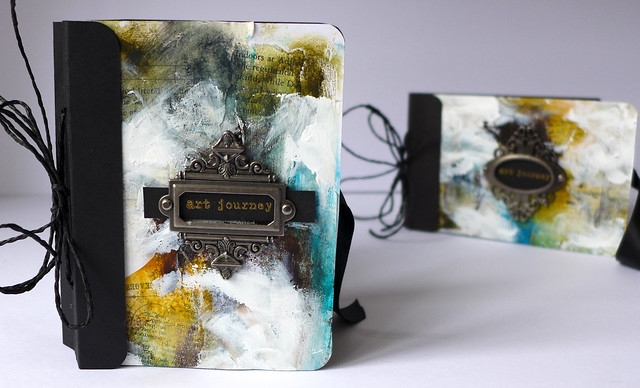
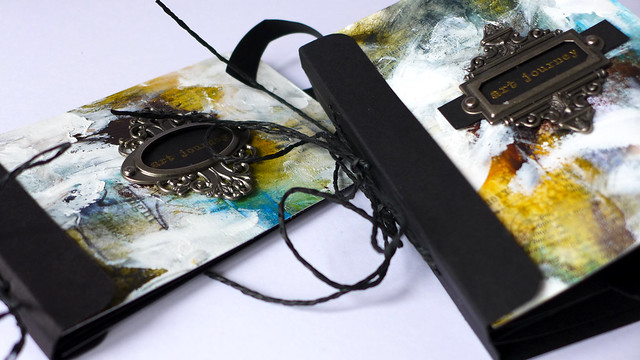
And so I created art journal covers with my art work. You can see how I made them in my Youtube video here.
I love how they turned out...
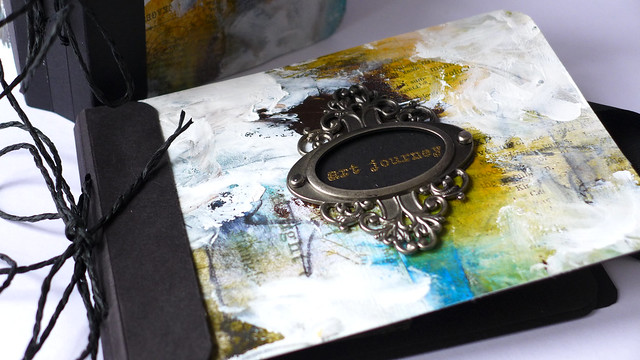
I didn't go too heavy on the oil sticks and love that I can still see my vintage papers and book text collage peeking through.
I deliberately don't even try and blend my white paint very much, I like the raw almost unfinished look. Maybe that's a bit weird but I just love messy art!
The gold heat embossed sentiments are from my favourite stamp set by Donna Downey called "Empowered Words" by Unity stamps.
I have used May Arts cord to secure my journal signatures.
I did wonder if anyone would watch my Youtube videos as the process of mixed media and abstract art can be soo ugly at times but you have to go through the ugly hot mess to get to the beauty. At least sometimes. It doesn't always work out lol.
I shall be entering my messy art journal covers in to the Simon Says Monday challenge this week which is called "play with paint".
You can see the whole process on my Youtube channel Red Queen Art Creations